Using mitmproxy to intercept Android traffic
Recently, I wanted to reverse engineer an Android application. As a part of my analysis, I wanted to look at how the app is using an external web API. In this post, I want to present how I set up my environment to intercept HTTPS requests from the Android device.
Emulator Setup
I used the Android Emulator to run the app. There are three types of Android systems you can run on the emulator:
- Systems with Google Play Store. These do not allow to install custom system CA certificates, so they are not suitable for us.
- Android Open Source Project (AOSP). These could work in principle, but many apps do not run without Google Play Services.
- Systems with Google Play Services, but without Google Play Store. These are the systems we want to use.
During the setup, you have to select a virtual device to emulate. Just pick any device without the Play Store logo:

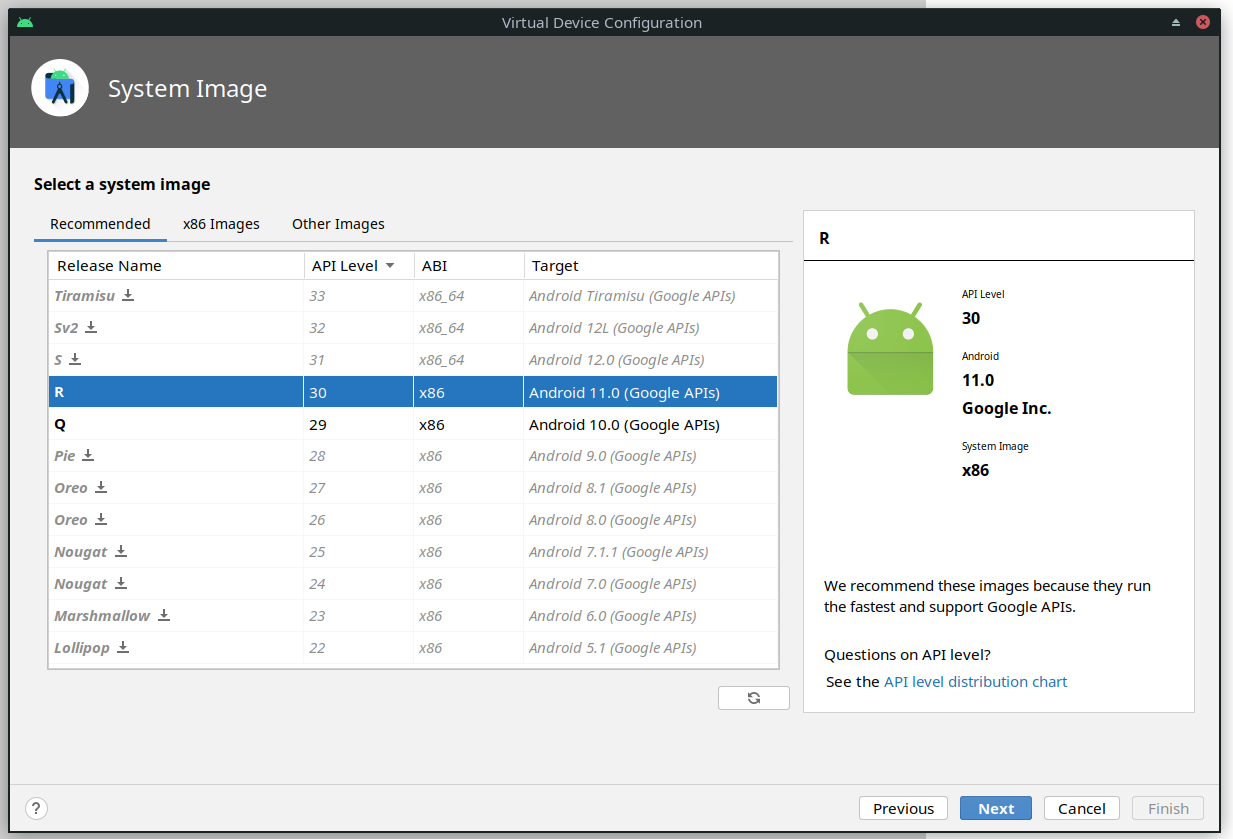
When selecting your ROM, use the Google APIs version:

Certificate Installation
Note: This section is based on https://docs.mitmproxy.org/stable/howto-install-system-trusted-ca-android/.
You should run mitmproxy (or mitmweb) as some other user than yourself. This will allow nftables to distinguish between mitmproxy traffic and traffic that should be intercepted.
After starting mitmproxy for the first time, you will find certificates and keys in ~/.mitmproxy/ where ~ is the home directory of the user you are running mitmproxy as.
As that user, we do the following:
cd ~/.mitmproxy
hashed_name=`openssl x509 -inform PEM -subject_hash_old -in mitmproxy-ca-cert.cer | head -1` && cp mitmproxy-ca-cert.cer $hashed_name.0
This creates a file like c8750f0d.0. We perform the following steps:
- Get the device name by running
emulator -list-avds. - We now need to start the Android emulator by running
emulator -avd <avd_name_here> -writable-system. - Restart adb as root:
adb root - Disable secure boot verification:
adb shell avbctl disable-verification - Remount partitions as read-write:
adb remount(adb reboot && adb root && adb remountif necessary) - Copy certificate:
adb push <path_to_certificate> /system/etc/security/cacerts - Set permissions:
adb shell chmod 664 /system/etc/security/cacerts/<name_of_pushed_certificate> adb reboot
You can now check in the device settings that the certificate is installed. You need to start the emulator with the -writable-system flag every time you want to intercept traffic with mitmproxy.
Proxy Setup
Start mitmweb. We want to redirect all IPv4 and IPv6 HTTP and HTTPS traffic to mitmproxy. Put the following in your /etc/nftables.conf (replace root with your mitmproxy user) and apply by running /etc/nftables.conf:
#!/usr/sbin/nft -f

flush ruleset

table ip nat  {
	chain output {
		type nat hook output priority 0; policy accept;

		skuid != root tcp dport {http, https} counter redirect to :8080
	}
}

table ip6 nat  {
	chain output {
		type nat hook output priority 0; policy accept;

		skuid != root tcp dport {http, https} counter redirect to :8080
	}
}
Note: this will proxy your own traffic as well. If you use your webbrowser, you will see certificate warnings popping up.
When running the app, you should see the traffic in mitmweb. To view the traffic in Wireshark, you can instruct mitmproxy to write SSL master secrets to a file:
SSLKEYLOGFILE="$PWD/.mitmproxy/sslkeylogfile.txt" mitmweb
In Wireshark, you can decrypt the TLS traffic by going to Edit > Preferences > Protocols > TLS > (Pre)-Master-Secret log filename.